Pikachu might be the most-drawn Pokémon on the planet — and also one of the most miskeyed. Most beginners rush straight to the ears and the famous cheeks and end up with a lopsided head, because they skip the one step that actually matters: building simple construction shapes first. This guide walks through that process from a blank page to a fully colored Pikachu, with tables, troubleshooting, and variations you won’t find bundled together elsewhere.
Quick answer: To draw Pikachu, start with a rounded square for the head and an oval for the body as guidelines. Add the pointed, black-tipped ears, oval cheeks, and simple facial features, then sketch the arms, stubby legs, and lightning-bolt tail. Erase the guidelines, ink the outline, and color with yellow, black, and red-brown accents.
What You’ll Need
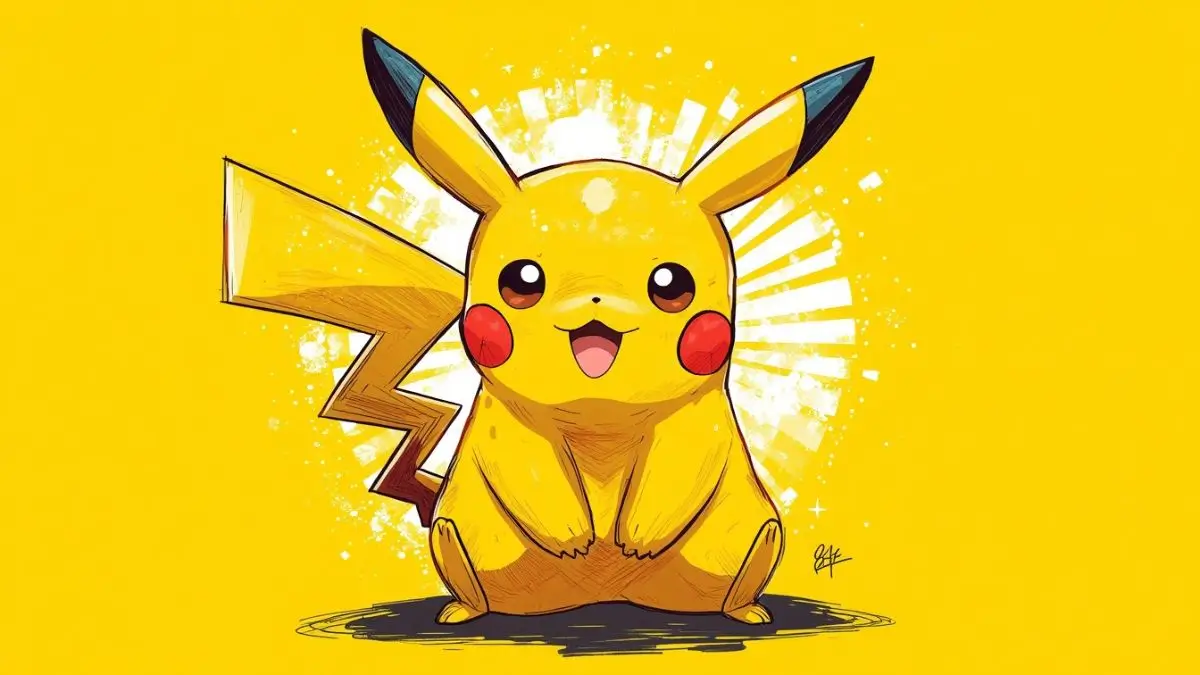
Pikachu’s design is built almost entirely from simple curves and a few sharp angles, which makes it a genuinely good subject for a first character drawing — not just a “kids’ tutorial” cliché.
Before starting, it helps to know which tools actually change the outcome and which ones are just preference.
| Pencil Grade | Best Use in This Drawing | Notes |
|---|---|---|
| 2H | Construction guidelines | Light, easy to erase without ghosting |
| HB | Rough shape sketching | Standard all-purpose grade |
| 2B | Final outline before inking | Dark enough to see clearly, still erasable |
| 4B–6B | Shading fur texture and shadow under the body | Skip for a flat cartoon style |
A kneaded eraser is worth the extra cost here specifically because Pikachu’s construction lines cross through the face and cheeks — a standard eraser tends to smear graphite into those small, detailed areas rather than lifting it cleanly.
Beginner vs. Advanced Method
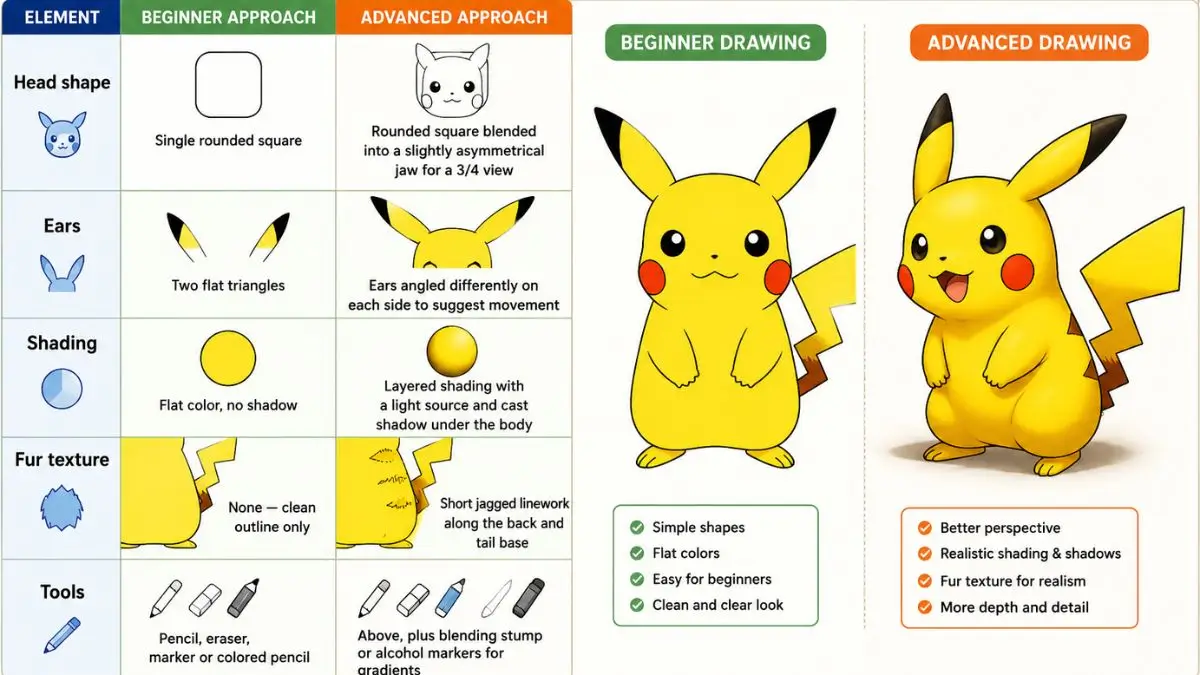
| Element | Beginner Approach | Advanced Approach |
|---|---|---|
| Head shape | Single rounded square | Rounded square blended into a slightly asymmetrical jaw for a 3/4 view |
| Ears | Two flat triangles | Ears angled differently on each side to suggest movement |
| Shading | Flat color, no shadow | Layered shading with a light source and cast shadow under the body |
| Fur texture | None — clean outline only | Short jagged linework along the back and tail base |
| Tools | Pencil, eraser, marker or colored pencil | Above, plus blending stump or alcohol markers for gradients |
Step-by-Step: How to Draw Pikachu
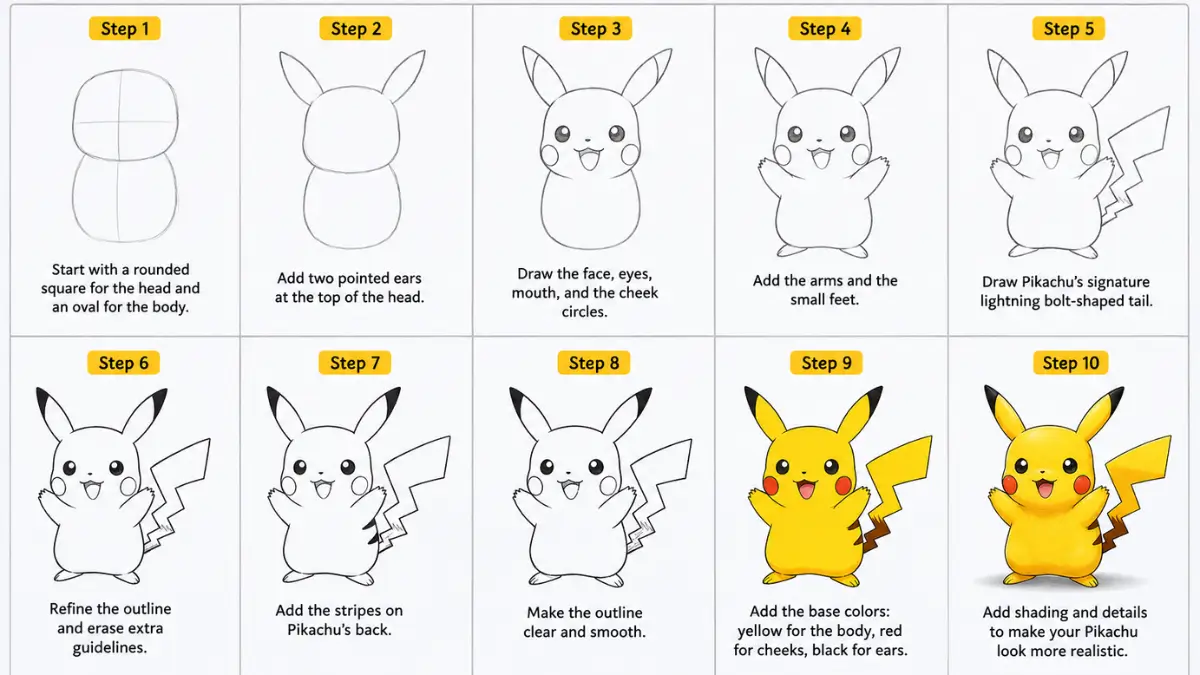
- Set the head guideline. Lightly draw a rounded square, slightly wider than it is tall, on the upper half of your page. Leave more space below it than above — Pikachu’s body needs room.
- Add the center cross. Draw a faint vertical line down the middle of the square and a horizontal line about a third of the way down. These crossing lines keep both sides of the face symmetrical.
- Block in the body guideline. Beneath the head, sketch a rounded, slightly flattened oval that overlaps the bottom of the head shape. This becomes the torso.
- Draw the ears. From the top corners of the head, extend two long, tapering triangles that curve slightly outward before narrowing to a point. Real Pikachu artwork rarely makes the ears perfectly symmetrical — a small tilt on one ear reads as more natural than a mirrored pair.
- Place the eyes and nose. On the horizontal guideline, add two small ovals for eyes with a tiny highlight circle left uncolored in each. Add a small triangular nose centered below them.
- Draw the mouth. Sketch a shallow “W” shape for the upper lip line, with a small open curve beneath it for the mouth, and a short rounded tongue shape inside.
- Add the cheeks. Draw two circles roughly level with the nose, positioned outside the lower face. These are Pikachu’s electric pouches — keep them a bit larger than beginners expect; undersized cheeks are one of the most common proportion mistakes.
- Refine the head outline. Trace over the rounded square with a smoother, slightly uneven curve that dips in near the cheeks and rounds out at the jaw, then erase the square guideline.
- Draw the arms and legs. Add two short, rounded arms extending from the upper body with a simple mitten-shaped hand at the end of each. Beneath the body, sketch two short, wide feet.
- Draw the tail. Starting from the base of the back, draw a bold zigzag shape that widens as it moves away from the body, ending in two or three sharp points. This is the step most beginners rush — a tail that’s too thin or too short reads as generic rather than distinctly Pikachu.
- Clean up the linework. Erase every remaining guideline, then go over the final outline with a 2B pencil or fine liner, thickening the outer silhouette slightly compared to the interior detail lines. This weighted-line technique is what makes the final image look intentional rather than sketchy.
- Color the drawing. Fill the body with a warm yellow, the ear tips and tail base with black, and the cheeks with a soft red-orange. Add a thin brown or dark-yellow shadow line where each body part overlaps another.
Coloring Your Pikachu
| Medium | Result | Best For |
|---|---|---|
| Colored pencils | Soft blending, good control over shading | Beginners who want forgiving, layerable color |
| Alcohol-based markers | Smooth, saturated color with visible blending zones | Intermediate artists comfortable working fast before ink dries |
| Digital coloring | Fully undoable, easy gradient and glow effects | Anyone drawing on a tablet or using a scanned line drawing |
| Watercolor | Soft, slightly uneven color with natural texture | Artists comfortable with wet media and drying time |
A technique many tutorials skip entirely: leave a small, uncolored highlight on each cheek and on the top of the head. That single unshaded patch is what gives the fur a glossy, rounded look instead of a flat sticker appearance.
Common Mistakes Beginners Make
- Making the tail too short or too thin. The zigzag tail is one of Pikachu’s most identifiable features — a stubby or narrow tail is the single fastest way for a drawing to read as “generic yellow mouse” instead of Pikachu specifically.
- Placing the cheeks too high or too small. They should sit level with the nose, not up near the eyes, and should be large enough to read clearly from a distance.
- Skipping the construction guidelines entirely. Jumping straight to the outline is the most common cause of an off-center face, especially in the eyes and cheek placement.
- Coloring before the outline is fully erased of stray guideline marks. Leftover pencil lines under color tend to show through, especially with lighter mediums like watercolor or thin marker layers.
Variations to Try Once You’ve Got the Basics
- Chibi/kawaii Pikachu: Shrink the body, enlarge the head to roughly 60% of the total height, and simplify the limbs into rounded stubs.
- Classic cartoon Pikachu: Follow the steps above with even, consistent line weight and flat cel-shaded color, matching the animated series look.
- Semi-realistic Pikachu: Add short, textured fur strokes along the outline, a visible light source with cast shadow, and subtle color variation across the yellow body instead of one flat tone.
Printable Template Option
For younger artists or anyone who wants to practice proportions before freehanding, two template styles work well as a starting point: a plain outline version with no internal guides, and a lightly shaded guide version showing where the cheeks, ears, and tail sections fall.
Tracing the guide version once or twice before attempting a freehand drawing is a faster way to internalize proportions than tracing repeatedly.
Frequently Asked Questions
Pikachu is built from a rounded square for the head, an oval for the body, triangular ears, circular cheeks, and a zigzag tail — no complex shapes are required.
Yes. Because the character relies on simple curves and a few sharp accents rather than complex anatomy, Pikachu is commonly recommended as a first character drawing for new artists.
A warm yellow for the body, black for the ear tips and tail base, and a red-orange for the cheeks cover the core palette; a light brown works well for shading.
Uneven proportions almost always trace back to skipping the construction guidelines — particularly the head cross-lines that keep the eyes, nose, and cheeks aligned.
An HB pencil works well for the initial rough shapes, a 2H for light guidelines you’ll erase, and a 2B for the final outline before inking or coloring.
Draw it as a bold zigzag that starts narrow at the body and widens toward the tip, ending in two or three sharp points — a thin or short tail is the most common tail mistake.
Yes — the same construction-shape process works on a drawing tablet, and digital tools make it easier to adjust proportions or try color variations without redrawing.
A chibi Pikachu enlarges the head relative to the body and simplifies the limbs, while a classic drawing keeps proportions closer to the animated series design.